

Cost: Low
Difficulty: Low-Medium
Time: 40-60 minutes
STEP 1: Gather Materials
Brown Dog Gadgets sells E-textile Starter Packs and Starter Sewing Supplies.
Tools
Needles
Scissors

Materials
Thread
Felt
Snaps

Parts

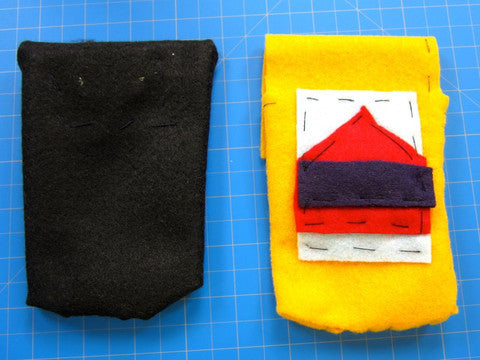
STEP 2: Cut the Felt and Measure Around Your Phone
Fold the felt over your phone to measure where to cut the felt, which will help make sure the case will fit your phone. Then, you can cut out a flap that will cover and hold your phone in place.


STEP 3: Cut Thread, Thread Needle, and Knot Thread
Cut conductive thread. Thread the needle. Ask for help, if needed. Tie a knot in the thread on the opposite end of the needle (knot three times). The purpose of tying a knot is to stop the thread from pulling all the way out of the material.


STEP 4: Layout Parts
LED light goes on top of the flap in order to light up when cover is closed. The "outie" snap goes on the inside of the flap. The "innie" snap goes on the pocket of the case. The battery holder goes inside the pocket on the same side as the "outie" snap. The LED and the battery holder should have the negative ends all facing one way and the positive ends facing the other. (Ex: Positives facing left and negatives facing right)
 Outside of Case
STEP 5: Secure the Snap
The "outie" snap will be sewn on the inside of the flap. Pull the needle through the inside of the flap through the hole on the snap and back down. Loop three more times. Pull the needle from the top flap down close to another hole. You will then push the needle through that hole back to the top of the flap. Loop three times. Repeat for the last two holes.

STEP 6: Sew the Snap to the LED Light
Continue using the same thread as you used to secure the "outie" snap. Connect the thread to the positive LED end by pulling through the hole and looping around three times. Knot on the inside of the flap and cut the thread (knot three times).

STEP 7: Sew the LED to the Battery Holder
Thread the needle with conductive thread and make a knot in the thread on the opposite side of the needle (knot three times). Pull the thread from the inside of the flap and back down through the hole of the negative LED light end. Loop three times. Continue to sew towards the negative end of the battery holder (cannot touch any other conductive thread you already sewn with). Sew through the hole and loop three times. Knot on the inside of the case and cut the thread (knot three times).
STEP 8: Sew the Battery Holder to the Snap
Thread the needle with conductive thread and make a knot on the opposite side of the needle in the thread (knot three times). Pull the thread from the inside of the case through the positive battery holder hole. Loop three times. Continue to sew towards the "innie" snap on the pocket. Pull needle through one hole of the snap and loop three times. Pull the needle through another hole. Loop three times. Repeat for the last two holes.

STEP 9: Test
First, turn the case right side out.
Your LEDs should all light up when you put the snaps together. If not, figure out why.
Do you have a Short Circuit?
Do you have a backwards LED?
STEP 10: Cover Battery
Everyone likes to protect his or her phone! Since the battery will be inside the case, your phone will be touching the battery. I advise to cover the battery with some felt!
STEP 11: Sew Outline of Case
Begin sewing the bottom of case with regular thread. Start on the folded side and sew towards the open side. Turn the corner and sew up the side of the case until the appropriate height of your phone. Tie knot and cut thread.

STEP 12: Decorate
Your phone koozie is complete! Now it's time for decorating the case. Decorate however you want it to look, but use regular thread.
Don't forget Brown Dog Gadgets does sell E-textile Starter Packs and Starter Sewing Supplies to get you started.