
Adapting Servos to LEGO
Servos are an amazing tool to help bring projects to life. They're inexpensive, easy to find, can be controlled from any micro controller on the market, and are the 'go to' solution for the education and Maker communities. But how the heck do you use them with LEGO? In this mini article we're going to talk about a couple of options available to adapt standard servos, with a focus on the common 9G sized ones, to get them to work in a LEGO brick environment.
Servos come in many shapes, sizes, and configurations but they more or less are motors attached to a potentiometer so a micro controller can tell it how far to spin. Whereas a regular motor would just spin and spin you can tell a Servo to go to the 45 degree mark and stop there. Exactly the kind of thing you need when you're making a robot hand or controlling the flaps of an RC airplane. One of the more common Servos found is a "9G" sized micro servo which can be bought for around $5 at any electronics website. As the 'go to' servo we'll be focusing on it in this write up.

LEGO has always made their own LEGO compatible servo, but you had to use it with their LEGO Mindstorm system or manually splice it apart. Not the most accessible item for working with an Arduino or Raspberry Pi based project. They can be bought on the LEGO website for $25, which isn't exactly inexpensive. So instead of buying that how about we talk about other options.

Laser cutting adaptors to make a 9G sized Servo play nice with LEGO has been a common solution for years now. The company MindSensors.com has made laser cut adaptors for many common servo varieties. They work pretty well and even use a novel two layer approach to adapt a servo horn to hold LEGO connectors. However at $20.75 for a single 9G servo and the laser cut parts, that does make it quite expensive. Especially when you can find Amazon listings that sell ten 9G servos for $18.

For quite some time we at Brown Dog Gadgets have been providing laser cut adaptors, similar to MindSensors, in several of our kits. We made a couple of variations on the same basic design and greatly cut down the price. We've used this design in our automated LEGO X-Wing and BB-8 projects. While it works, it most certainly has limitations which often caused many frustrations on our part.

If you have access to a laser cutter or CNC router and want to try our designs you can download them for free off our GitHub Repo as we've released them Open Source. We used 1/8th inch acrylic for out cuts, and I assume you could get away with using 1/8th inch wood as well if you wanted to.

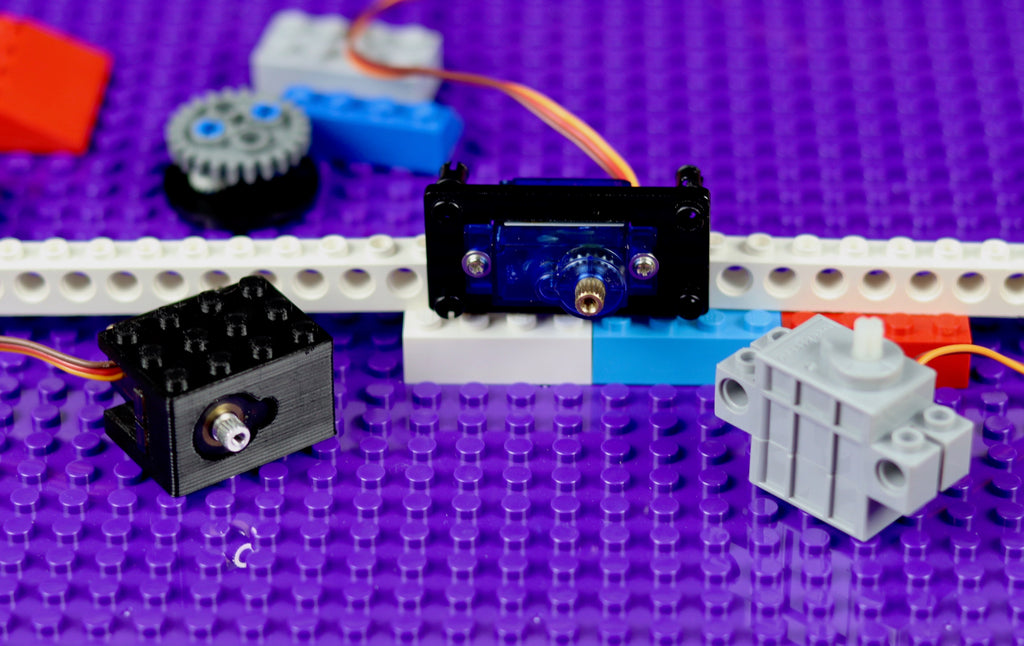
Another Open Source option for awhile now has been to 3D print your own servo adaptor. Thingiverse.com is full of user created designs for various sized servos. We particularly like the Parametric Servo Gripper Not-LEGO Brick Set by MechEngineerMike as it provides quite a few design styles, one of which can be seen in the picture above.

As easy as you'd think it would be to just print your own adaptors this process comes with a lot of issues. For one, LEGO has very precise tolerances and even minor variations in the way 3D printers create will cause LEGO pieces to not connect properly (which seemed to happen the majority of the time no matter how much we tweaked things). Plus 3D printed plastic is not particularly strong and you'll end up breaking off 3D printed LEGO studs or snapping things in half quite frequently. We found that overall we had much better luck with laser cut adaptors working than waiting another 2 hours to test out the next 3D printed part.

Clearly we were not the only people having this problem. A Chinese company called Kittenbot went the much more difficult route and just built a standard 9G Servo into a LEGO compatible body with a LEGO axel output shaft. There are female receptors on the bottom, male and female receptors on the arms, and even two holes for attaching axels or other LEGO technic components. We recently used two of these to make a missile turret.
At under $10 this does make it the cheapest commercial option out there; you can find them on Amazon or via this link on BrownDogGadgets.com. (We now include them in several of our kits.) They even have a version that's just a standard motor in the same body, only it's red. So why am I not jumping up and down about it more?

There are a couple of downsides. First, it really should have female receptors on large flat side (not the one with the wire sticking out, but the one opposite that). Mounting a servo horizontally is awkward, and it seems that most projects need a horizontal orientation. We cracked one open and were a bit sad to see that the internal gears were plastic, not metal. Servos use a small gear set to greatly slow down the internal motor speed. The problem with plastic gears is that it's very easy for a kid, or happy adult, to accidentally break them. We had this issue with the 9G servos we sold years ago and made the decision to switch to more expenisve metal gear servos. While we've not had any of these Servos break on us we'd have preferred to see metal gears. Just to be more kid friendly.

If you have some servos in your possession already and don't want to take any of these approaches, you could just hot glue a LEGO brick onto the side of your servo. No, seriously. That works pretty well. The one big problem is connecting LEGO prices to the horn mount. If you have a 3D printer you can print your own adaptors that actually work pretty well, however you should just buy the nice injection molded version off Adafruit's website for $0.75. It'll save you a lot of time and hair pulling, and lets be honest; theres always something off Adafruit's website that you need anyways. (Like our Bristlebots!)

Those are all your servo options for the LEGO world. While none of these options is 100% perfect they all work well enough for most Arduino or Micro:Bit projects. We're going to keep using the Geek Servos from Kittenbot in our kits as they're the most classroom friendly option.
If we missed something please email us and we'll add it to the list.